Pages

Showing posts with label lens. Show all posts

Panoramic Photography

Panoramic photography is a technique of photography, using specialized equipment or software, that captures images with elongated fields of view. It is sometimes known as wide format photography.his generally means it has an aspect ratio of 2:1 or larger, the image being at least twice as wide as it is high. The resulting images take the form of a wide strip.


What equipment do I need?


Tripod

Tripod
By using a tripod you can ensure that the camera rotates around a fixed spot and that it stays level. It also makes it much easier to take longer exposures, which may be useful if you want to get a nice sharp picture with everything in focus. You can use a monopod, but you will have to hold it (which means more chance of camera shake and of the position changing between shots. A monopod is useful if there is no space for a tripod, and you can get long poles for shooting panoramas high up (these are in effect monopods) - for examples see AGNOS
Check that you can lock the head of the tripod firmly and that it doesn't wobble when locked. If it does it will be difficult for you to make sure the camera stays level while you are shooting, especially if you have a large camera or if you use a panoramic head , because the weight may make the tripod's head even more unstable.
If you do not use a tripod or fail to keep the photo  camera level, you may have problems stitching your pictures (depends on the software used) and you may end up having to crop your panoramas down, thereby reducing the vertical field of view . This is not true if you shoot a spherical panorama as you can re-align the panorama afterwards in software.


Spirit level

A spirit level is a pretty essential extra and you can buy very cheap little spirit levels designed to fit into the hot shoe of an SLR photo camera . Use the spirit level to make sure the tripod's head is level and that when you attach the panoramic head and photo camera, that these are level also.
If you shoot spherical panoramas you do not need to set up the panoramic head to be perfectly level since you can realign the stitched image with the horizon afterwards in software. However a spirit level like this is, in my opinion, nevertheless an essential piece of equipment.

Remote shutter release

If you find that you are doing long exposures quite often, then a remote release cable or an infra red remote release can be useful. By using this you also reduce the likelihood of accidentally knocking the tripod or camera while you are doing the shoot. If you are using a digital SLR photo camera and it has mirror-lockup, using that feature with a remote shutter release allows you to minimise vibrations when you shoot the panorama.


Panoramic head ("pano-head")

Pano-head
A panoramic head is an additional attachment you put on the top of the tripod before you attach the photo camera. It allows you to position the camera so that as you pan to take each picture you are rotating around the no-parallax-point of the photo camera lens. This in turn eliminates parallax which could otherwise prevent you achieving a sharp high-quality panorama. If you look closely at the object movie of the Kaidan Kiwi 900/950 panoramic head you will notice that the centre of the lens is above the point of rotation and that the camera is rotating about a point in the lens, not the photo camera body. For more information see the description of parllax and the article about using a panoramic head.
Panoramic heads also make it easier to rotate the camera smoothly and many have click-stops of some kind and a spirit level. These features are also available in the Q-top, which is a very neat small tripod mount that provides a quick release shoe for the camera. The shoe is held very tightly in position when placed back onto the mount, and the shoe has 30 degree increments to make it easy to shoot a series of pictures for a panorama. But the Q-top is no substitute for a panoramic head.

Wide angle lens

By shooting several pictures and stitching them together, you can create a 360 degree panoramic picture, no matter what lens you have on your camera. A wide angle lens has the advantages that you don't need to take as many pictures and  you can capture more vertically so the picture doesn't look like a narrow 'slit'.If you are considering buying a wide angle lens for your panoramic photography, beware that some stitching software supports only rectilinear ('normal') lenses, some support fisheye lenses and some support both. Be particularly careful to check stitching software if you are intending to use a fisheye lens.If you are new to panoramic photography I suggest you postpone any ideas of buying a special lens until you have shot a few panoramic pictures... you will then have a good idea of whether you want or need a wide angle lens and how wide a lens you need to achieve the sort of pictures you want.An 8mm lens is generally the widest lens available for any camera, and on a full-frame camera will create a circular image that represents approximately 180 degrees in all directions. Unsurprisingly using an 8mm lens or equivalent is the easiest/fastest way to create spherical panoramas in which you can look straight up at the ceiling and straight down at the floor, and not just side to side. If you intend to buy an circular fisheye lens, remember that although there are many products that can stitch these images, not all can. 


Shooting the pictures


How many pictures?

Each picture should overlap with the next by up to 50% (or at least somewhere between 30 and 50%). But please note that providing you overlap each picture with the next, it doesn't matter exactly how much overlap you use, and the amount of overlap can be different between each pair of pictures. So, you can just guess 50% overlap and that will be fine. If you think you will need 10 pictures but you take 9 or 11, it doesn't matter!


Depth of field

Generally panoramic pictures capture a scene rather than a moment. In other words most panoramic pictures are of places rather than of people or events as such, therefore you will probably want to aim for a crisp picture that captures the entire scene through to the horizon. To do this you want to set a very large depth of field so that everything in shot is in crisp focus, by focusing on the hyperfocal distance.
When determining the depth of field you need, remember that when shooting indoors you do not need to focus further than the walls of the room and therefore you are likely to be able to widen the aperture and consequently reduce the exposure time.
Avoid altering the depth of field because to do this you will need to alter focus, and when you alter focus you subtly change the field of view of your lens. Most software cannot cope with a mixture of lenses being used for a panoramic sequence - they assume the same lens was used throughout, or more specifically that the lens was used with exactly the same settings.


Exposure

That leaves just one thing to play with. Exposure. You might have a scene in which everything is well lit in which case you can probably set an exposure for every frame. However you will quite often come across situations where the lighting changes. Lighting problems can perhaps be generalised as:
  • areas of strong shadow in a scene where there is also strong light
  • light directly at the camera in part of the scene
The first of these is more likely. I find it useful to spin my photo camera around the scene while holding the shutter button halfway . I can then instantly see whether there is going to be a problem because the photo camera will show me in the viewfinder the exposure it thinks is appropriate for each image. If the exposure changes dramatically I will have a problem: if I let the photo camera judge exposure, it will ensure each picture is as good as it can be. But that means any two adjacent images could differ greatly in lighting conditions so that a shadow in one is barely visible in another. That will confuse the stitching application.
I allow the exposure to change by no more than two increments between frames (e.g. if one shot was taken at 1/30sec then the next one should be no less than 1/60sec and no more than 1/15sec). If a scene contains a mixture of brighter areas and darker areas, I will meter correctly for an intermediate position, and then slightly over expose the dark areas (to make them lighter) and slightly under expose the light areas to make them darker


 Panoramic Photo Gallery


 information from panoguide.com

Macro Photography

Taking close-up pictures of small things is called "macro photography." I have no idea why. Perhaps because the small things in macro photography are generally larger than the things you are taking pictures of when doing "micro photography". If you really want to be pedantic then you should say you are doing "photomacrography".

What Kind of Camera


Point and shoot digital cameras can have remarkable macro capabilities, but for best results you want a single-lens reflex camera. These allow you to attach special-purpose macro lenses and show you in a bright optical viewfinder what you will get on the sensor.
A typical setup might be a Canon Digital Rebel XTi  with a Canon EF-S 60mm f/2.8 Macro USM . This lens is designed for the small-sensor Canon cameras and gives a working distance equivalent to 100mm on a full-frame photo camera. The lens is specified to focus down to "1:1" or "life size". This means that the smallest object you can photograph that will extend to the corners of the final digital photo will be the same size as the sensor inside the Canon Rebel camera, 15x22mm. A professional photographer might use Canon EOS 5D  and a lens designed for full Canon EF 100mm f/2.8 Macro USM. Confusingly, this lens is also specified to focus down to "1:1", but this time the sensor is 24x36mm in size, the old 35mm film standard. So you can't take a photo of something quite as small as with the cheaper equipment.
In the film world, the 35mm photo camera systems had comprehensive range of macro lenses and accessories and some medium format systems, such as the Rollei 6008 would have at least a few lenses and extension tubes. Only the extremely patient ever did macro photography with a 4x5 inch view photo camera.


Close-Up Lenses


Your eyes don't focus so great on really small things either. Do you try to pull your cornea a foot away from your retina? No. You stick a magnifying glass in front of your cornea. You can do the same thing for your normal lens. Unlike your cornea, it even has convenient threads for attaching a magnifying glass. The magnifying glass screws into the same place where a filter would go.


Macro Lenses

The best macro lenses are the latest autofocus mount models made by Canon and Nikon, typically in focal lengths ranging from 50 to 200mm. Each lens will focus continuously from infinity to 1:1. You can shoot the moon and capture the bear claw without stopping to change lenses or screw in filters. How do these lenses work? Do they just have a much longer helical than the 50mm normal lens? Yes and no.


Macro Zoom Lenses


Macro zoom lenses are not macro lenses. They don't allow significantly greater magnification than a 30mm or 50mm normal lens and they deliver low quality.


Exposure

Unless you are using close-up lenses, when doing any kind of macro work, you always have to consider the effective f-stop. Even if you are using the SLR body's built-in meter, which will correct automatically for light loss, you can't turn off your brain. Why not? Because the effective aperture affects picture quality.
Taking pictures through a pinhole results in tremendous depth of field but very low sharpness due to diffraction. This is why lenses for a 35mm film camera stop at f/22 and don't go to f/45 or f/64. Large format camera lenses provide these smaller apertures for two reasons: (1) the lenses are longer (f/64 on a 210mm lens is not all that small a hole); (2) the negative won't be enlarged very much.
If you're at 1:1 and have selected f/22 on the macro lens barrel, you need to look at the lens markings and/or the close-up exposure dial in the Kodak Professional Photoguide to learn that your effective aperture is f/45.
If you're using a handheld meter, you absolutely must use these corrections (e.g., meter says f/22 but you're focussed down to 1:1 so you set f/11 on the lens barrel).

Lighting


A good quick and dirty lighting technique is to use a through-the-lens (TTL) metered flash with a dedicated extension cord). A modern handheld flash is extremely powerful when used a few inches from a macro subject. That lets you stop down to f/16 and smaller for good depth of field. You can hold the flash to one side of the subject and have an assistant hold a white piece of paper on the other side to serve as a reflector. If you want a softer light, you will have enough power in the flash to use almost any kind of diffusion material. The TTL meter in the camera will turn the flash off when enough light has reached the sensor.
Lighting is the most important and creative part of any kind of photography.

Focus


With a depth of field of around one millimeter for precise macro work, camera positioning and focus become critical. If you have a good tripod and head, you'll find that you have at least 10 controls to adjust. Each of them will move the camera. None of them will move the camera along the axis that you care about.
That's why people buy macro focusing rails, e.g., Adorama Macro Focusing Rail . These are little rack and pinions capable of moving the entire camera/lens assembly forward and back. You use the tripod to roughly position the camera/lens and then the macro rail to do fine positioning.
The photos below are snapshots from the garden of the Getty Center. They were taken with a fancy Canon EF 180mm f3.5L Macro USM , but without a tripod.

Macro Photo Gallery


 information from photo.net


Smoke Art Photography

Getting the smoke right

Before anything, Graham points out that there is no ‘right’ way to photograph smoke. His technique has developed over a long period of time, and Graham admits to learning and discovering new things every time he sets out to take the photos.
The two key secrets to smoke photography is inverting the image, and using gray smoke. Say what now? How does that work? Well, Graham explains: “It’s quite a simple technique, really. All you need to concentrate on when you are taking the photos themselves, is getting good images of the smoke. The colours are generated digitally at a later stage.”
To get the best possible smoke to work with, Graham uses simple incense sticks known as Joss sticks, which can be purchased from most Chinese supermarkets and in every Chinatown anywhere in the world. Alternatively, any reasonably large incense stick should do the trick.
Once you’ve got the smoke, the rest is all down to freezing the motion, and getting the lighting right. “In my opinion,” explains Graham, “the key technical factor is to adequately light the smoke so that it stands out from the background.”
While smoke in itself can be an interesting subject matter, Graham points out that in his photos, the smoke itself isn’t the subject matter, it is merely the tool used to create unusual photographs: “I am not trying to create pictures of smoke; I am trying to create pictures by using smoke”. This approach means that you have full creative licence to do what you want to manipulate the smoke as much as necessary — the only thing you have to worry about is getting an impressive final result.

Lighting and exposure

The best way to get ‘cleanly’ lit smoke photos is to use a clean environment with controllable light. A studio would be ideal, but anywhere you can hang up a black background is perfectly usable. The most important thing when photographing smoke is getting enough light to freeze the motion of the smoke in mid-air. You can do this by using a lot of light (think direct sunlight falling through a window) or by using one or more flashes. When you’re photographing the smoke, you’ll want to make sure that no stray light hits the front of your camera lens (this will cause glare or solar-flare type effects), nor on your blackened background (because that will bring out definition in the background, which you don’t want either).
When you are photographing, it is easiest to let the smoke rise on its own volition. Instead of trying to manipulate the incense stick, try wafting some motion into the air to disturb the even plume. Alternatively, you can try to create interesting shapes by making the plume turbulent: try introducing a ruler, an upturned spoon, or a sheet of paper into the plume to alter its shape and ‘feel’.
“I want clean lines and shapes”, Graham explains. To do this, he shoots with a lot of light at a small aperture (and thereby a deeper depth of field). “This is very much easier to do if the smoke is allowed to rise naturally.”
With the smaller aperture needed to capture the plumes of smoke properly, you obviously lose quite a bit of light. This is a problem, because in order to freeze the motion of the constantly-moving smoke, you need quite a fast shutter time. In practical terms, this means 1/250 or faster. Simultaneously, you can’t reduce the ISO value on your camera either, because the purile plumes of smokes would be ruined by significant amounts of noise. Needless to say, a coinciding need of low ISO, small apertures and high apertures means that you need a vast amount of light.
Personally, my best smoke photos were taken with a 2000W Bowen studio flash light with a humongous soft-box fitted on the front. I prefer this solution because the softbox gives even lighting, but it can be difficult to limit where the light goes, so the above-mentioned limitations of “no light on your background or photo camera lens” can get tricky. I find that if you put the soft box really close to the smoke, you can get excellent results. Having said that, my smoke photos aren’t nearly as good as Graham’s, and he uses a different approach: “For all practical purposes the light used to expose the image comes from one studio flash unit fitted with a snoot and placed at the side or behind the smoke. I realise that not everyone has one of these units, but an off camera flash gun fitted with or placed beside a baffle to protect the background from direct light works just as well.”
If you’re going to be working with external flashes anyway, you probably need to shoot in fully manual mode: Your internal light meter is unlikely to give you a lot of joy on this one. In addition, it’s absolutely vital to get it right. You’ll need to set your flash output and aperture so the brightest part of the smoke is almost completely white, but not quite. Overexposure means that you will lose detail, and the inverted image will have a lot of black in the smoke, which just looks unnatural. Under-exposure, on the other hand, will make it difficult to see the difference between the smoke and the background.
Once you’re taking photos, it’s worth keeping in mind that you need to keep the room well-ventilated. Not because the smoke will harm you (although it probably will, if you breathe in and get enough in your eyes, etc), but, as Graham puts it: “as the air fills up with the fog of dissipated smoke your pictures will be robbed of light, contrast and sharpness” — never mind your health, think of the photos!


Digital manipulation

Now that you’ve captured the photos, it’s time to take it to your digital darkroom. Crop your image to a composition that works for you, and then use levels or curves to adjust the contrast of your photos. You’ll want to make sure that the background is completely black (hold the alt key while adjusting the black-point levels slider in Photoshop, it gives you a preview of what you’re actually doing), so it turns into a pure white when you invert the image.
Once you’re happy with the background, invert your image, and decide if you like the black or white background best — stick with whatever you prefer, but often the white backgrounded images have a lot higher impact. If you have stray smoke, dust, or details in the background you’re unhappy with, use a brush with the same colour as the background (i.e white or black) or clone tool to get rid of them.
To colourise the smoke, use the hue and saturation tool. You can apply the colour to the whole image in one go easily, because your pure white or black background will be unaffected by this tool (if it does make changes, then your background needs some work first). Alternatively, you can colorise part of the image, or use multiple colours, by making a selection of a part of the smoke, and use the ‘feather selection’ command to create a gradient. Using the Hue and Saturation tool now results in colorising parts of the smoke image only. Nifty, yes?

Smoke Art Photo Gallery


 information from  pixiq.com

Night Photography

Equipment Required

 I recommend following equipment to use.
  • Digital camera
  • Tripod
  • Remote shutter release
  • Something to do while exposing your shot
Now let’s get down to business. First, set your tripod up at the desired height, to save you any trouble later on make sure your tripod is level. You will thank me. Now, mount the camera on the tripod making sure it’s secure.

Setting Up Your Shot


Switch your photo camera to manual. OK, you’ve got this far it’s going good, time to set up the shot. Don’t bother composing your shot just yet as we have to sort some other things out first. Set your photo camera to auto-focus or AF. This may not work depending on the conditions but most of the time it will work just fine. Zoom in all the way and find a light source or light area that is the same distance away as the subject you want in focus, press the shutter half way down. Once the photo camera has focused on the light source or light area zoom all the way out  and make sure, without touching the shutter or the focus ring switch back to manual focus. Be sure you’re not touching the focus ring when you compose.
Now you have the camera focused you can proceed to compose the shot. This is something that no tutorial can tell you how to do, this is in the eye of the photographer. Be creative and show off your creative eye.
Tip: Wide angles create a bigger impact than longer focal lengths.


Setting The Correct Exposure


You’re almost there, the next major part is getting the exposure right, this is easy if you know how. The best way to expose your shot manually is to use your photo camera’s built in light meter as a rough guide, but not as a precise judge. When you first start you will need to follow it tightly but as you gain more and more experience you won’t need the meter at all.
Change the photo camera to AV mode(Aperture priority) Now, set the ISO to 1600. As a rough guide I recommend you stop down the aperture to f/8 to achieve maximum sharpness when using the Canon 18-55mm kit lens but you may need to keep it at f/3.5 depending on the conditions. Now, press the shutter half way and you will see the light meter, it’s a line with a small arrow, this will move around as you change the aperture. Adjust aperture accordingly so it makes the line stay in the middle. Once it is in the middle, press the shutter down half way. The photo camera will give you the shutter speed that you require, make sure you remember this number as you will need it to work out how long your final exposure will be.
For this next part you may need a calculator, depending on how good your mental arithmetic is. Now we need to calculate how long we need to keep the shutter open for. As an example we will say the photo camera gave you a shutter speed of 10 seconds when we used the light meter, keep this number in your head. Now set the ISO to 100. Take your number (In this example 10 seconds) and multiply that number by 16. This gives us 160 seconds, Divide this by 60, this gives us about 3 minutes.
Now plug in your remote shutter release, set the photo camera to BULB mode (move the shutter down past 30 seconds). Get a timing device (Phone, stop watch ) and get it prepared to begin. Press the remote shutter release and lock it on. Start the timer.
If you want to be certain of good exposure then you can round it up to the nearest minute (In our case 3 minutes). Once you have reached the target time, unlock the remote shutter release and wait for the photo camera to proceed with noise reduction.
The end result will be a nicely exposed picture.


Gallery Of Night Photography


information from adcuz.co.uk

Motion Blur Photography

How to Capture Motion Blur

Capturing movement in images is something that many photographers only think to do when they are photographing sports or other fast moving subjects.
While there is an obvious opportunity in sports photography to emphasize the movement of participants – almost every type of photography can benefit from the emphasis of movement in a shot – even when the movement is very small, slow or subtle.

Tips for capturing movement:


1. Slow Down Your Shutter Speed
The reason for movement blur is simply that the amount of time that the shutter of a camera is open is long enough to allow your camera’s image sensor to ’see’ the movement of your subject.
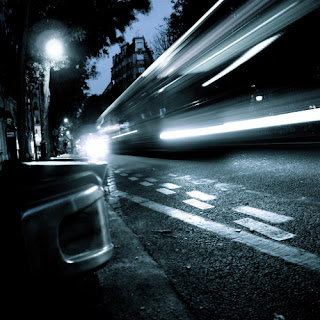
So the number one tip in capturing movement in an image is to select a longer shutter speed.
If your shutter speed is fast (eg 1/4000th of a second) it’s not going to see much movement (unless the the subject is moving mighty fast) while if you select a longer shutter speed (eg 5 seconds) you don’t need your subject to move very much at all before you start to see blur.
How long should your shutter speed be? – Of course the speed of your subject comes into play. A moving snail and a moving racing car will give you very different results at the same shutter speed.
The other factor that comes into play in determining shutter speed is how much light there is in the scene you are photographing. A longer shutter speed lets more light into your camera and runs the risk of blowing out or overexposing your shot. We’ll cover some ways to let less light in and give you the option to have longer shutter speeds below.
So how long should your shutter speed be to get movement blur in your shot? There is no ‘answer’ for this question as it will obviously vary a lot depending upon the speed of your subject, how much blur you want to capture and how well lit the subject is. The key is to experiment (something that a digital camera is ideal for as you can take as many shots as you like without it costing you anything).

2. Secure Your Camera
There are two ways to get a feeling of movement in your images – have your subject move or have your camera move (or both). In the majority of cases that we featured in last week’s post it was the subject that was moving.
In this type of shot you need to do everything that you can to keep your camera perfectly still or in addition to the blur from the subject you’ll find that the whole frame looks like it’s moving as a result of using a longer shutter speed. Whether it be by using a tripod or have your camera sitting on some other still object (consider a shutter release mechanism or using the self timer) you’ll want to ensure that camera is perfectly still.

3. Shutter Priority Mode
One of the most important settings in photographing an image which emphasizes movement is the shutter speed (as outlined above). Even small changes in shutter speed will have a big impact upon your shot – so you want to shoot in a mode that gives you full control over it.
This means either switching your camera into full Manual Mode or Shutter Priority Mode. Shutter Priority Mode is a mode that allows you to set your shutter speed and where the camera chooses other settings (like Aperture) to ensure the shot is well exposed. It’s a very handy mode to play with as it ensures you get the movement effect that you’re after but also generally well exposed shots.
The other option is to go with Manual mode if you feel more confident in getting the aperture/shutterspeed balance right.

How to Compensate for Long Shutter Speeds When there is too Much Light


1. Small Apertures
So how do you cut down the amount of light that gets into your camera to help compensate for a longer shutter speed? How about changing the size of the hole that the light comes in through. This is called adjusting your camera’s Aperture.
If you shoot in shutter priority mode the camera will do this automatically for you – but if you’re in manual mode you’ll need to decrease your Aperture in a proportional amount to the amount that you lengthen the shutter speed.
Luckily this isn’t as hard as you might think because shutter speed and aperture settings are organized in ’stops’. As you decrease shutter speed by a ’stop’ you double the amount of time the shutter is open (eg – from 1/250 to 1/125). The same is true with Aperture settings – as you decrease the Aperture by one stop you decrease the size of the shutter opening by 50%. This is great because an adjustment of 1 stop in one means that you just need to adjust the other by 1 stop too and you’ll still get good exposure.

2.Decrease Your ISO
Another way to compensate for the extra light that a longer shutter speed lets into your camera is to adjust the ISO setting of your camera. ISO impacts the sensitivity of your digital camera’s image sensor. A higher number will make it more sensitive to light and a lower number will make the sensor less sensitive. Choose a low number and you’ll find yourself able to choose longer shutter speeds

3. Try a Neutral Density Filter
These filters cut down the light passing through your lens and into your camera which in turn allows you to use a slower shutter speed.
It is sort of like putting sunglasses on your camera (in fact some people actually have been known to use sunglasses when they didn’t have an ND filter handy).
For instance, if you’re shooting a landscape in a brightly lit situation but want a shutter speed of a second or more you could well end up with a very over exposed image. A ND filter can be very helpful in slowing the shutter speed down enough to still get a well balanced shot.
Another type of filter that can have a similar impact is a polarizing filter. Keep in mind however that polarizers not only cut out some light but they can impact the look of your image in other ways.


information from smashingmagazine.com