Pages

Showing posts with label photographic camera. Show all posts

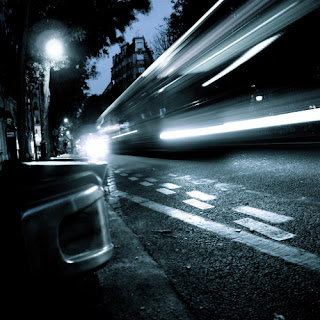
Night Photography

Equipment Required

 I recommend following equipment to use.
  • Digital camera
  • Tripod
  • Remote shutter release
  • Something to do while exposing your shot
Now let’s get down to business. First, set your tripod up at the desired height, to save you any trouble later on make sure your tripod is level. You will thank me. Now, mount the camera on the tripod making sure it’s secure.

Setting Up Your Shot


Switch your photo camera to manual. OK, you’ve got this far it’s going good, time to set up the shot. Don’t bother composing your shot just yet as we have to sort some other things out first. Set your photo camera to auto-focus or AF. This may not work depending on the conditions but most of the time it will work just fine. Zoom in all the way and find a light source or light area that is the same distance away as the subject you want in focus, press the shutter half way down. Once the photo camera has focused on the light source or light area zoom all the way out  and make sure, without touching the shutter or the focus ring switch back to manual focus. Be sure you’re not touching the focus ring when you compose.
Now you have the camera focused you can proceed to compose the shot. This is something that no tutorial can tell you how to do, this is in the eye of the photographer. Be creative and show off your creative eye.
Tip: Wide angles create a bigger impact than longer focal lengths.


Setting The Correct Exposure


You’re almost there, the next major part is getting the exposure right, this is easy if you know how. The best way to expose your shot manually is to use your photo camera’s built in light meter as a rough guide, but not as a precise judge. When you first start you will need to follow it tightly but as you gain more and more experience you won’t need the meter at all.
Change the photo camera to AV mode(Aperture priority) Now, set the ISO to 1600. As a rough guide I recommend you stop down the aperture to f/8 to achieve maximum sharpness when using the Canon 18-55mm kit lens but you may need to keep it at f/3.5 depending on the conditions. Now, press the shutter half way and you will see the light meter, it’s a line with a small arrow, this will move around as you change the aperture. Adjust aperture accordingly so it makes the line stay in the middle. Once it is in the middle, press the shutter down half way. The photo camera will give you the shutter speed that you require, make sure you remember this number as you will need it to work out how long your final exposure will be.
For this next part you may need a calculator, depending on how good your mental arithmetic is. Now we need to calculate how long we need to keep the shutter open for. As an example we will say the photo camera gave you a shutter speed of 10 seconds when we used the light meter, keep this number in your head. Now set the ISO to 100. Take your number (In this example 10 seconds) and multiply that number by 16. This gives us 160 seconds, Divide this by 60, this gives us about 3 minutes.
Now plug in your remote shutter release, set the photo camera to BULB mode (move the shutter down past 30 seconds). Get a timing device (Phone, stop watch ) and get it prepared to begin. Press the remote shutter release and lock it on. Start the timer.
If you want to be certain of good exposure then you can round it up to the nearest minute (In our case 3 minutes). Once you have reached the target time, unlock the remote shutter release and wait for the photo camera to proceed with noise reduction.
The end result will be a nicely exposed picture.


Gallery Of Night Photography


information from adcuz.co.uk

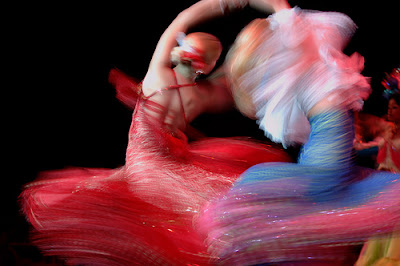
Motion Blur Photography

How to Capture Motion Blur

Capturing movement in images is something that many photographers only think to do when they are photographing sports or other fast moving subjects.
While there is an obvious opportunity in sports photography to emphasize the movement of participants – almost every type of photography can benefit from the emphasis of movement in a shot – even when the movement is very small, slow or subtle.

Tips for capturing movement:


1. Slow Down Your Shutter Speed
The reason for movement blur is simply that the amount of time that the shutter of a camera is open is long enough to allow your camera’s image sensor to ’see’ the movement of your subject.
So the number one tip in capturing movement in an image is to select a longer shutter speed.
If your shutter speed is fast (eg 1/4000th of a second) it’s not going to see much movement (unless the the subject is moving mighty fast) while if you select a longer shutter speed (eg 5 seconds) you don’t need your subject to move very much at all before you start to see blur.
How long should your shutter speed be? – Of course the speed of your subject comes into play. A moving snail and a moving racing car will give you very different results at the same shutter speed.
The other factor that comes into play in determining shutter speed is how much light there is in the scene you are photographing. A longer shutter speed lets more light into your camera and runs the risk of blowing out or overexposing your shot. We’ll cover some ways to let less light in and give you the option to have longer shutter speeds below.
So how long should your shutter speed be to get movement blur in your shot? There is no ‘answer’ for this question as it will obviously vary a lot depending upon the speed of your subject, how much blur you want to capture and how well lit the subject is. The key is to experiment (something that a digital camera is ideal for as you can take as many shots as you like without it costing you anything).

2. Secure Your Camera
There are two ways to get a feeling of movement in your images – have your subject move or have your camera move (or both). In the majority of cases that we featured in last week’s post it was the subject that was moving.
In this type of shot you need to do everything that you can to keep your camera perfectly still or in addition to the blur from the subject you’ll find that the whole frame looks like it’s moving as a result of using a longer shutter speed. Whether it be by using a tripod or have your camera sitting on some other still object (consider a shutter release mechanism or using the self timer) you’ll want to ensure that camera is perfectly still.

3. Shutter Priority Mode
One of the most important settings in photographing an image which emphasizes movement is the shutter speed (as outlined above). Even small changes in shutter speed will have a big impact upon your shot – so you want to shoot in a mode that gives you full control over it.
This means either switching your camera into full Manual Mode or Shutter Priority Mode. Shutter Priority Mode is a mode that allows you to set your shutter speed and where the camera chooses other settings (like Aperture) to ensure the shot is well exposed. It’s a very handy mode to play with as it ensures you get the movement effect that you’re after but also generally well exposed shots.
The other option is to go with Manual mode if you feel more confident in getting the aperture/shutterspeed balance right.

How to Compensate for Long Shutter Speeds When there is too Much Light


1. Small Apertures
So how do you cut down the amount of light that gets into your camera to help compensate for a longer shutter speed? How about changing the size of the hole that the light comes in through. This is called adjusting your camera’s Aperture.
If you shoot in shutter priority mode the camera will do this automatically for you – but if you’re in manual mode you’ll need to decrease your Aperture in a proportional amount to the amount that you lengthen the shutter speed.
Luckily this isn’t as hard as you might think because shutter speed and aperture settings are organized in ’stops’. As you decrease shutter speed by a ’stop’ you double the amount of time the shutter is open (eg – from 1/250 to 1/125). The same is true with Aperture settings – as you decrease the Aperture by one stop you decrease the size of the shutter opening by 50%. This is great because an adjustment of 1 stop in one means that you just need to adjust the other by 1 stop too and you’ll still get good exposure.

2.Decrease Your ISO
Another way to compensate for the extra light that a longer shutter speed lets into your camera is to adjust the ISO setting of your camera. ISO impacts the sensitivity of your digital camera’s image sensor. A higher number will make it more sensitive to light and a lower number will make the sensor less sensitive. Choose a low number and you’ll find yourself able to choose longer shutter speeds

3. Try a Neutral Density Filter
These filters cut down the light passing through your lens and into your camera which in turn allows you to use a slower shutter speed.
It is sort of like putting sunglasses on your camera (in fact some people actually have been known to use sunglasses when they didn’t have an ND filter handy).
For instance, if you’re shooting a landscape in a brightly lit situation but want a shutter speed of a second or more you could well end up with a very over exposed image. A ND filter can be very helpful in slowing the shutter speed down enough to still get a well balanced shot.
Another type of filter that can have a similar impact is a polarizing filter. Keep in mind however that polarizers not only cut out some light but they can impact the look of your image in other ways.


information from smashingmagazine.com


Black and White Photography


Black and white photography

Funnily enough, in the age of digital SLR's and highly colored computer graphics, black and white photography seems to be re-emerging as a strong trend. Many new photographers presume that all they need to do is take the shot in black and white to start with, using the onboard monochrome camera setting. If only black and white photography was that easy. Like any style of photography, it takes practise. Otherwise, you could end up with a photo that seems flat and lifeless.

Black and White Photography Tips

 1.Shoot in RAW

I know many readers of DPS can’t shoot in RAW (because their photo camera doesn’t offer it) or don’t shoot in RAW (because they either don’t know how or don’t like to) but for the most control in the post production phase of converting your color images into black and white ones – you’ll want to shoot in RAW if your photo camera does allow it. Of course shooting in JPEG doesn’t stop you shooting in black and white – but if it’s an option, give RAW a go, you might be surprised by what it offers you in post production

 2.Low ISO

Shoot with the lowest possible ISO possible. While this is something that most of us do in color photography it is particularly important when it comes to black and white where noise created by ISO can become even more obvious. If you’re after this ‘noise’ (or grain) you can always add it later in your post production – but it’s harder to go the other way and take noise out. 

3.When to Shoot 

Many digital photographers actually prefer to shoot images for Black and White in low contrast situations. So an dark or overcast day can be a great time to shoot out door shots.
Ironically these are the days that those who shoot only in color sit at home complaining about the ‘poor light’. So next time you find yourself with a dark and gloomy day – shoot some black and white shots.
 
4.Composition 
 
Most of the general tips on how to compose or frame a good shot apply just as well to black and white photography as they do when shooting in color – however the main obvious difference is that you’re unable to use color to lead the eye into or around your shot. This means you need to train yourself to look at shapes, tones and textures in your frame as points of interest. Pay particularly attention to shadows and highlights which will become a feature of your shot


Black and  White photogpahy gallery


Gary Winogrand

Toni Frissell

Maurizio Polese

Sally Mann

Gabriele Caretti


information from smashingmagazine.com


Celebration Of High-Speed Photography


A digital camera, some fast-moving subject, and a bit of knowledge about how to take the best pictures of moving subjects will launch you on the road to some of the most interesting photographs you’ve ever taken. Although some blurring can be effective in communicating a sense of high-speed motion, some photographers want the subject to be frozen in time to get some pretty special photographic effects.

High Speed Photography at Home

How totake high speed photos You can use this technique to take picture of exploding things like tomatoes, watter balloons, watermelons, or even you Canon photo camera as you smash it against a wall for not understanding the menus (Sorry, could not resist...)
 

Freezing fast motion (AKA High Speed Photography), can give some pretty special photographic effects. High Speed Photography is used in physics, health research, sports and more. This guide describes how to capture super fast movements using ordinary camera gear and a little home made electronics. I will describes the setup I used the problems I encountered and what I did to solve or work around them.

Capturing such images introduces a lot of challenges. How does one handle timing with exposures times

faster than 1/6000 second!?
We have to handle shutter lag, synchronize the flash and time the exposure to just the right moment.

But the shutter lag of any normal photo camera is so long that it will be all most impossible to time the exposures. And how do you synchronize the flash with an exposure time of less than 1/6000 second?
To work around the problems with shutter lag and flash synchronization, the exposure is done in a completely dark room. This way the shutter can opened without actually getting an exposure. The exposure time set on the photo camera just has to be long enough for the action to happen while the shutter is still open. Because the room is dark, the long exposure time will not have any effect on the final output (this is because no light enters the lens to hit the sensor / film)

To actually get an "exposure", a flash is fired. The flash light duration will now become the actual

exposure time.
SO now we need to see how long does it takes the flash to fire. It turns out that the output power of the flash, actually affects the duration of the light, so to get exposure times. If you need exposure faster than 1/6000 seconds, the output needs to be reduced.
Now we only need to synchronize the flash with the action we want to capture.
This can be done in several ways. For example synchronizing with a balloon puncture, can be done via sound. Impact-actions, like a BB Soft air gun pellets, can be triggered with a mechanical switch, like in the picture below. When the pellet hits the cd-cover it's pushed on to the switch, which then triggers the flash.
Here is my High Speed Photography setup and work flow (Balloon Shot).
 
The Gear:
  • Balloon (OK - we are going to nuke this one, so don't use your favorite)
  • Digicam
  • Tripod
  • Sigma Flash
  • Home made sound trigger (more info). If you do not have an optical slave you can use the Universal Sound Slave Circuit
  • Needle (or BB-gun)
  • Backdrop (I use a black Bristol sheet)
The Setup
First step is to set-up the scene. The black Bristol sheet is used as backdrop. The balloon, flash, microphone
and camera are placed like in to image below
high_speed_photography_setup.gif
Gear settings:
  • Flash: optical slave and 1/16 output power.
  • Camera: Exposure time: 1-2 sec. ISO 100-200 Aperture F 11-16 manual focus.
  • Microphone: The distance between the balloon and microphone, is used for synchronization. 50-70cm is good for balloon punctures :-)
Next step is framing and focusing:
While trying to stay within the best performance on the lens, I either zoom or move the tripod, until I have the desired framing. Focus can be obtained either automatic or manual, but do remember to switch to manual to lock focus, otherwise the camera will try to focus when the lights are switched off.
Now it's time to test the setup and lightning. All lights are switched off and the shutter is set to bulb.

To fire the flash I just clap my hands. Then I review the image on the camera, checking for exposure, framing, focus and DOF.
To get the correct amount of light / exposure, one can Increase or decrease:

- the strobe distance to the balloon

- the output power of the flash

- the aperture on the  photo camera

- ISO sensitivity on the photo camera
Taking the shot

The test is repeated until satisfactory result have been reached, and the real photo can be taken. This is done the same way as when testing, but instead of clapping, the balloon is punctured with a needle.
One could also just fill the balloon with water and shoot it with a BB Soft air gun :-)


Some cool High Speed Photography


information from smashingmagazine.com


Gieant photo camera


Built by photographer Chris McCaw. Apparently, he got his start in DIY photography equipment for financial reasons- he sold his expensive large format photo camera to pay rent, and figured out how to build a replacement for $150. Since then, he's been building larger and larger photo  cameras, such as the 30x40" version shown above. From the Photo-Eye Blog:"Building my own photo  camera was a really liberating process as a photographer. Sometimes you get into that rut of having big dreams of owning high-end camera gear. The reality is that if you use your imagination and a practical sense of what you want to accomplish, you can do most anything. I feel confident that I can pretty much make any camera I need (I'm currently up to 30x40" mounted on a garden wagon). I also just made one on the base of a wheelchair to hold a 125 lb aerial photo camera lens!
The wheelchair photo camera (my friends call it 'the sad robot') was just built last month. So far it is only an 8x10" photo camera, but it has a 600mm f/3.5 lens that projects an image about 16x20". I was told the lens came off a U2 spy plane -- it is a beast. I use a car jack to raise and lower the lens. I even needed to get a handicap ramp to get it into the van
! ".


information from likecool.com

What you see is what you get - KODAK eyeCamera


On April 1, 2009 Kodak had introduced a KODAK eyeCamera 4.1 photo camera... The 4.1 version, obviously it is the April Fool, but I like this product or concept... It looks like super cool! Click 2 enlarge!
"What you see is what you get" Viewfinder - Now you can take that photo at the exact moment you see that special scene.
Facial Recall Assistant - Handy for parties and reunions.
Image Stabilizer - After a glass of wine or two, this feature will ensure that all of your photos are razor sharp, maybe even sharper than you remember.
Selective Auto-Focus & Zoom - See something you like? Just look, focus, zoom & snap! This is a new feature so use it wisely. It might get you in trouble at the beach so practice at home first.
Wink and Shoot Shutter - Taking photos is now as easy as a winking! We use our patented eyeVu technology to activate only on a wink, not a blink. When you have a cold and are sneezing it is advised you not wear your KODAK eyeCamera 4.1 photo camera or you will get pictures of your feet (think about it).
Digital X-Ray Vision - No way? Yes way! In partnership with the Superman Corporation located in the Fortress of Solitude, we co-developed this amazing feature at a bargain price. But remember, even though you will be able to see through walls and closed doors you will not be able to walk through them.
Panoramic Mode - Achieved merely by employing classic Kodak ease-of-use and turning one's head 360- degrees
The KODAK eyeCamera 4.1 photo camera is social media compatible so you will be able to stream your life 24x7! Easy photo uploads to Facebook, Flickr, KODAK Gallery, and Twitter are a snap. Now you can impress your friends with an endless stream of photos to accompany the running commentary of text updates you currently provide.


information from  likecool.com

Only for lady Kodak 1881


Many memories and sentimental nostalgia has become associated with lockets. You usually display pictures of the deceased or loved ones in lockets to keep them close to your heart. With that in mind, the 1881 concept was designed to reference the heritage and value of heirlooms, with a twist of added tech goodness. The 1881 has a built-in digital photo  camera with the goal being to add to the medium at which you can store loved photos.
Every time the 1881 is opened, favorite photos of yours are displayed, just in case you need a memory to reflect on. It’s such a good idea because you can’t really know where you’re going until you know where you came from. The 1881 is a gadget concept dedicated to do just that.

information from gearfuse.com

Fleximus’s Concept Camera

Since the dawn of the digital age of photography there has been a startling growth in the ability of cameras to work in conditions that could have only come out of a James bond flick. The most prominent amongst these features is the ability to shoot around corners which is facilitated by the introduction of complex swivel screen setups; but fleximus from artlebedev has taken this concept and bent it to the limits of modern technology with their concept of  the lens being mounted on a flexible cable.
This camera not only allows you to shoot at angles which traditional cameras thought as inconceivable but also offers you the versatility of having it attached to either a three inch display or a compact view finder. The camera comes with minimal controls which may dishearten the pros, but it means that anyone can use it straight out of the box; thus making it a very handy point and shoot photo camera.
One could say that the concept was inspired by the endoscope ( the small photo camera on the end of a wire that doctor’s use to view their patient’s insides) but made use for more fun purposes such as getting a shot of the underside of a mushroom. However unlike the endoscope this photo camera offers a 12 megapixel resolution which is top notch for a design this radical.
And even though the price is not mentioned I doubt that those James Bond hopefuls would flinch when it came to picking up this cool cam; or they could just check out this mini spycam.

info from walyou.com

Seitz 6x17 Digital shoots at 160 megapixels


When we first spotted this new photo camera from Seitz, our jaws hit the floor and rebounded a few times. No, it's not the highest megapixel count we've seen, but this megalith of a camera shoots at 160 megapixels to create a native 6 x 17-cm image, is packed with an ISO range from 500 to 10,000, a read-out speed of 300MB per second, and a shutter speed of 1/20,000th second. So the next question is, how are you going to store such huge image files (nearly 1 GB per uncompressed full panorama), certainly not on your off-the-shelf 16GB SDHC card, nor the upcoming 64GB CompactFlash cards -- but rather via gigabit Ethernet to Seitz's "state-of-the-art computer system", which translates to a decked out Mac mini. So what will this much imaging power cost you? 45,500 Swiss francs ($36,266) for the "mobile version" and 42,300 Swiss francs ($33,715) for the "studio version", and we're assuming that the Mac mini is included for that price. However, given that this camera isn't quite what you'd front for a down payment on a Swiss châlet, the 6x17 Digital surely must be affordable to average working-class Zürich banker set, no? You can catch a glimpse of this bad boy at the upcoming Photokina expo in Germany, or can throw down some serious Swiss coinage now to pre-order this gargantuan cam, which won't become available until early 2007. Also, be sure to click through for two more glamour shots.


information from engadget.com